Maya Human UV Part1 / 人物UV貼圖 1
3D角色有好的UV分佈,可以減少之後材質不正常的扭曲。人物UV貼圖系列單元將跟大家分享3D角色製作與調整UV的方法。P1 先跟大家分享角色: 頭與身體 拆UV的方法.
操作步驟
1、調整UV參數掌握原則
整體性:Unfold / Relax:Pin UV border+ Non Pin UVs區域性:Relax:Pin UV border+ Pin UVs(視區域及扭曲情形調整參數值)
PS:
RelaxUV在Maya 2016 版本指令為: UV Editor 視窗 / Polygons / Optimize指令。
以下內容有():則為Maya 2016版本指令。
2、整理模型
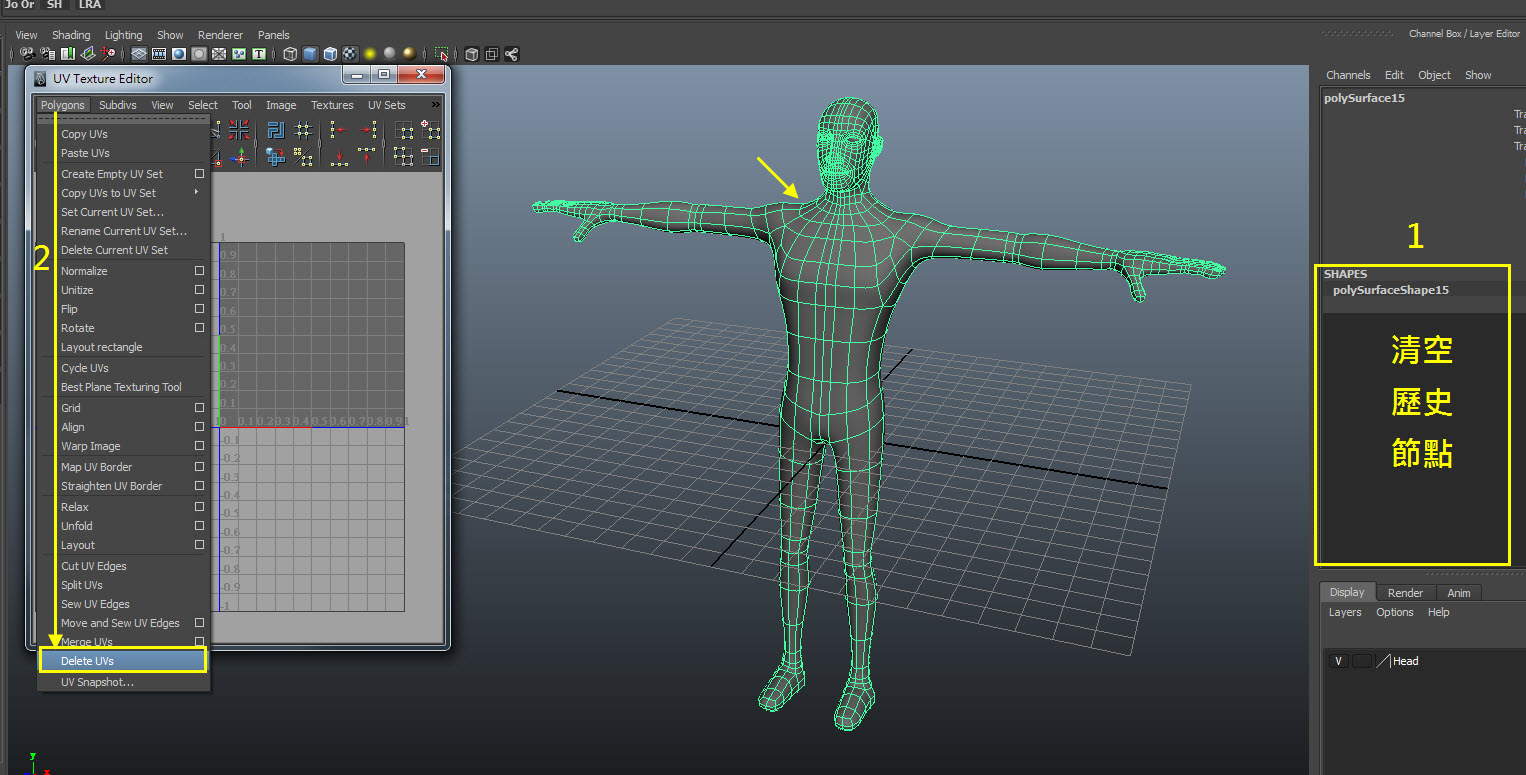
2.1先刪除一半的模型與 History節點
2.2
刪除原有UV:選擇Model,在UV Texture Editor(UV Editor)/ Polygons // Del UVs。

2.3
平均化頂點Average Vertices (5~10)平均化:先選擇Model,在Mesh / Average Vertices。PS:面數越少的模型,建議將數值設定低於5(避免模型產生過度的平滑而變形)
2.4
新增一顆材質球,並載入測試用的網格貼圖。
3 、頭部UVs
3.1選取頭部區域的面,先貼上網格材質,再執行Create UVs / Spherical Mapping。
3.2
調整Spherical Mapping貼圖軸心:Projection Center X為0,對齊模型的1/2處。
3.3
繼續調整 Spherical Mapping貼圖軸心:可稍為移動並旋轉,讓頭部UV分佈儘量減少拉扯到UV有較整齊的分佈即可。
3.4 顯示區域UV邊界(方便識別各部份的UV區域)。
執行Display / Polygons / Custom Polygon Display: 開啟Texture Border選項。
4、調整頭頂扭曲的UV區域
4.1選擇頭頂附近UV拉扯明顯區域的面。
4.2
執行Create UVs / Planar Mapping。
並設定Planner Projection的投影軸向,使UV分佈更流暢即可。
4.3
在UV Texture Editor(UV Editor),視窗調整頭頂區域UV的:大小、位置與旋轉到符合原來頭部UV的比例。
4.4
選擇頭頂區域UV與原來頭部區域UV的共用邊,再執行 Polygons / Move and Sew UV Edges。
4.5 調整頭部UV分佈。
在UV Editor 視窗,選到有扭曲區域部分的UV點,執行Polygons / Relax UV (Optimize)。設定如下:勾選Pin UV border、 World space 、 Max lit 設定5~10。
4.5
其它有重疊的小區域(如:眼睛或嘴巴)請以手動方式自行調整到UV不疊合,且網格分佈儘量不扭曲為原則即可。
4.6
之後可以選擇UV兩邊的分佈調整為整齊直線狀:先選到最左邊or右邊的1排UV點,
執行Polygons / Align。之後再視情形執行Relax UV即可。
5、脖子UVs
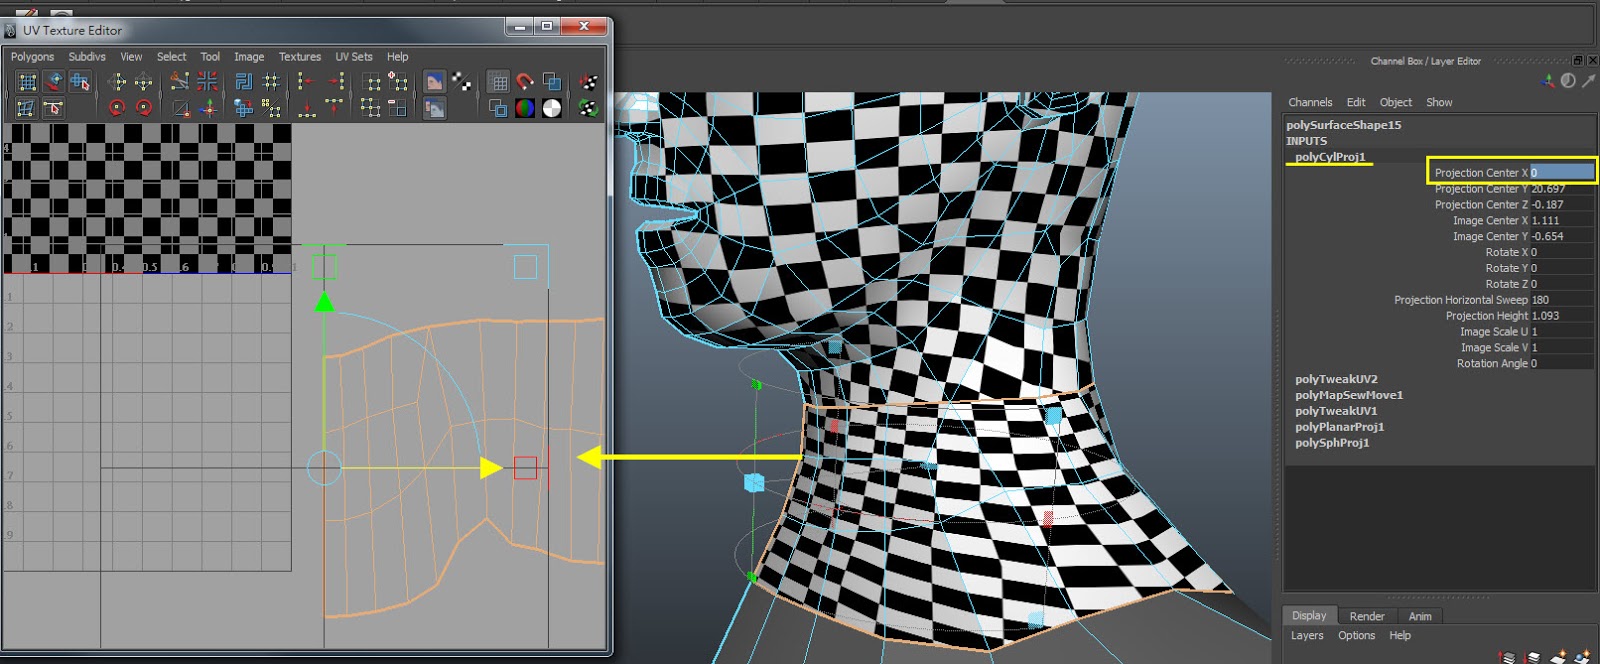
5.1選擇脖子區域的面,先貼上網格材質,再執行Create UVs / Cylindrical Mapping。
5.2
調整Cylindrical Mapping貼圖軸心:Projection Center X為 0,對齊模型的1/2處。
5.3
繼續調整Cylindrical Mapping貼圖軸心:可稍為移動並旋轉,讓脖子UV分佈儘量減少拉扯,並有較整齊的分佈即可。
 5.4
5.4以頭部UV為基準,調整脖子區域UV比例的大小。
5.5 縫合脖子與頭部的UV
選擇頭部底下與脖子上面的共用邊,執行Polygons / Sew UV Edges。
5.6 調整UV的分佈。
在UV Editor 視窗,選到有扭曲區域部分的UV點,執行Polygons / Relax UV (Optimize)。設定如下:勾選Pin UV border與Pin UVs、 World space 、 Max lit 設定5~10。
6、身體UV
6.1選擇身體區域的面:胸部+身體+跨下+肩膀處。
6.2
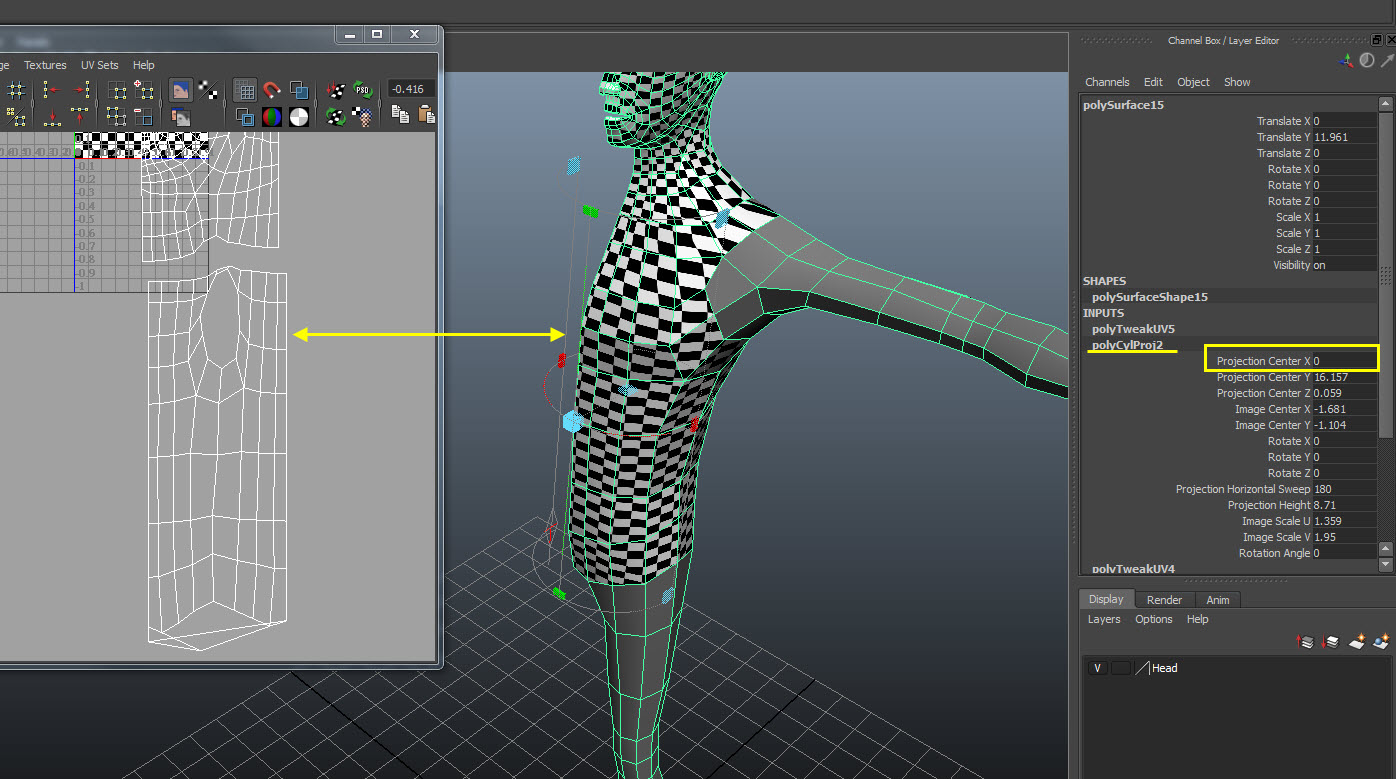
先貼上網格材質,再執行Create UVs / Cylindrical Mapping。
6.3
調整Cylindrical Mapping貼圖軸心:Projection Center X為0,對齊模型的1/2處。
6.4
繼續調整 Cylindrical Mapping貼圖軸心:可稍為移動並旋轉,讓身體UV分佈儘量減少拉扯,並有較整齊的分佈即可。
6.5
以頭部UV為基準,調整身體區域UV的位置、比例。

7、調整肩膀扭曲的UV區域
7.1
選擇肩膀附近UV拉扯明顯區域的面。
7.2
執行Create UVs / Planar Mapping。
並設定Planner Projection的投影軸向,使UV分佈更流暢即可。
7.3
在UV Texture Editor(UV Editor),視窗調整頭頂區域UV的:大小、位置與旋轉來符合身體UV的比例。
7.4
選擇身體與肩膀區域UV的共用邊,再執行Polygons / Sew UV Edges。
7.5 調整身體區域UV分佈。
在UV Editor 視窗,選到有扭曲區域部分的UV點,執行Polygons / Relax UV (Optimize)。設定如下:勾選Pin UV border、 World space 、 Max lit 設定5~10。
8、調整胯下拉扯區域
8.1選擇跨下拉扯區域的面,再執行Create UVs / Planar Mapping。並將 Planar Project : 設定為Y軸(or Camera)。
8.2
選擇跨下區域1/2處的邊,再執行Polygons / Cut UV Edges。
8.3
調整好跨下UV的前、後方向與位置,分別選擇與身體的共用邊,再執行 Polygons / Move and Sew UV Edges。
8.4
Polygons / Align工具:對齊身體兩邊的UV。之後再視情形執行Relax UV即可。


留言